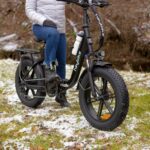
Why We Choose E-Bikes — Even When It’s Pouring
We love that an e-bike can turn a chaotic school run into a calm, on-time commute — even in rain. Studies show more families choose bikes for short trips, and we know why: speed, simplicity, and the joy of fresh air. Rain is inconvenient, not a deal-breaker.
With small routines and the right gear, we stay warm, safe, and dry without drama. These are eight real-mom tips we use: prepping electronics, picking the right tires, adding fenders, dressing smart, packing waterproof, boosting visibility, riding with weather sense, and quick post-ride care. Practical, proven, and made for family life. We’ll share simple, tested steps you can use tomorrow — no time wasted at all, ever.
Prep the E-Bike Electronics and Battery for Wet Conditions
Check weather ratings and seals before every ride
We look for IP ratings (e.g., IPX4, IPX6) when buying — higher second digits mean better protection against splashes and jets. As a quick habit, we check rubber gaskets around the battery, display, and motor housings for cracks, and wiggle wiring entry points to spot loose seals. Once, a cracked display mount let rain in mid-commute; that taught us to inspect mounts weekly.
Waterproofing basics: connectors and simple fixes
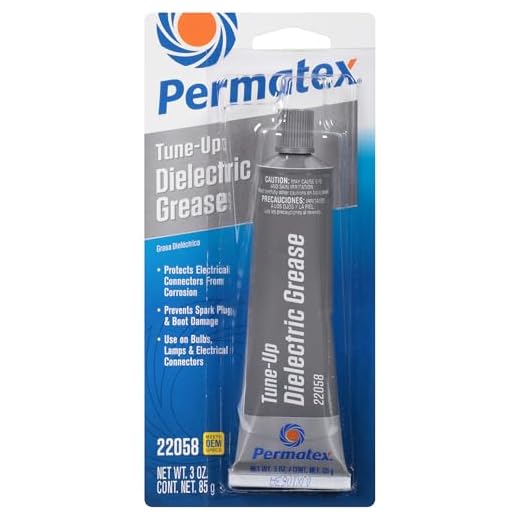
Keep small rubber caps on unused ports, and use dielectric grease on exposed connectors to repel moisture and corrosion. A tiny dab seals out water and keeps pins happy on a long rainy run.
We also carry a small roll of self-fusing silicone tape for temporary wraps and a ziplock for emergency dry storage.
Battery storage and charging routines
We never charge a wet battery — towel dry and wait indoors. Store batteries in a cool, dry place overnight after a wet commute to prevent internal moisture build-up. If you have a Bosch, Shimano, or Shimano Steps unit, their sealed packs are forgiving, but treat any battery with visible damage as suspect and get it checked.
Safe limits for standing water
Avoid puddles deeper than the axle or mid-hub; if water reaches the motor casing or connector level, walk the bike. After crossing wet patches, stop briefly to dry connectors and listen for unusual noises — early checks save stranded mornings.
Quick pre-ride checklist:
- Inspect gaskets and ports
- Ensure rubber caps are seated
- Dab connectors with dielectric grease as needed
- Confirm battery clicks securely into its mount
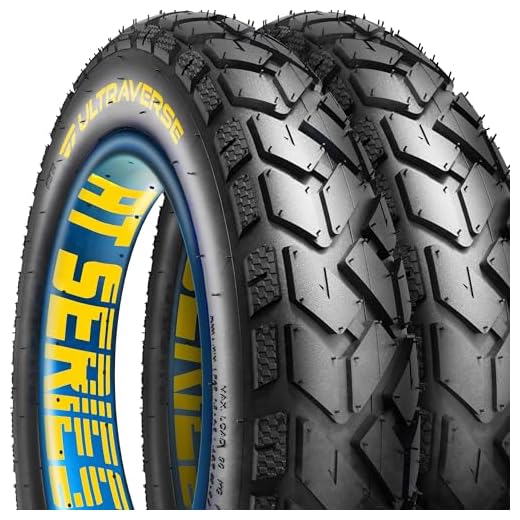
Choose Traction: Tires, Tire Pressure, and Tread That Work in Rain
Pick tires that bite in wet weather
We lean toward tires with softer rubber compounds and closely spaced tread that evacuates water without feeling grabby. Reliable commuter picks we’ve used: Schwalbe Marathon Plus and Continental Contact Plus — both balance grip and puncture protection for city rain. In heavier mud or gravel commutes, a knobblier tread (like WTB or Maxxis all-conditions tires) helps.
Width, puddles, and pressure
Wider tires float over shallow puddles and reduce pinch flats under a child seat, but they can hydroplane if tread is slick. Lowering pressure by 10–20% improves contact patch and traction when we carry cargo; for us that’s usually 40–55 psi on hybrid tires, less on wider tires. Always test braking in a safe spot after pressure changes.
When to switch to puncture-resistant or all-weather tires
If our routes have glass, thorns, or lots of salt, we swap to puncture-resistant models. Do it before the season starts — mid-commute swaps are no fun. Signs to replace tires: flat spots, exposed cords, or tread less than 1.5–2 mm.
Small kit, big peace of mind
We carry:
- A spare tube or tubeless sealant and mini pump
- Patch kit and tire levers
- Small multi-tool
Ride technique matters: slow, smooth inputs — gradual braking and steering — avoid painted lines and wet leaves. Next up, we’ll show how fenders and splash guards keep that traction working for the whole family.
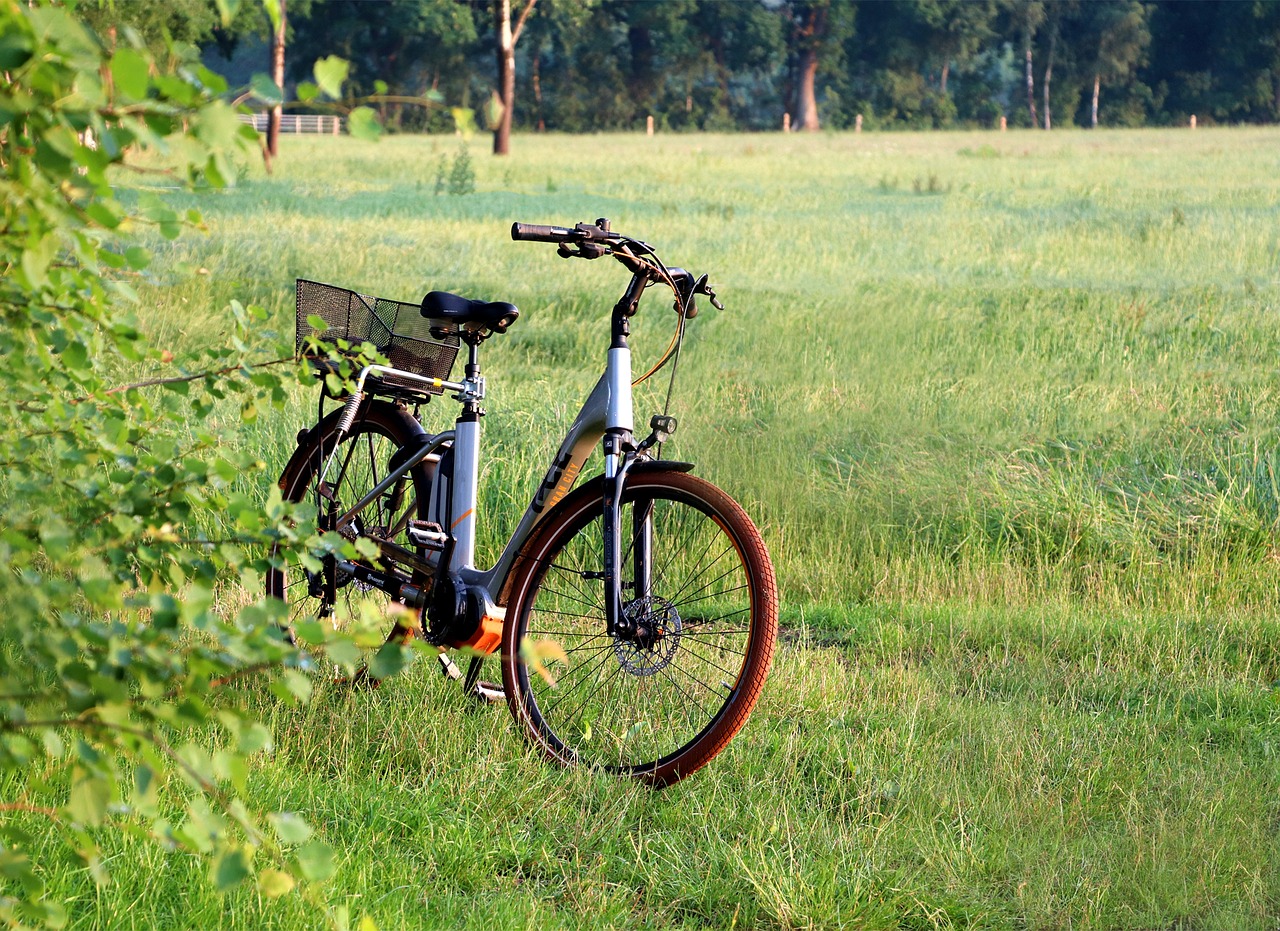
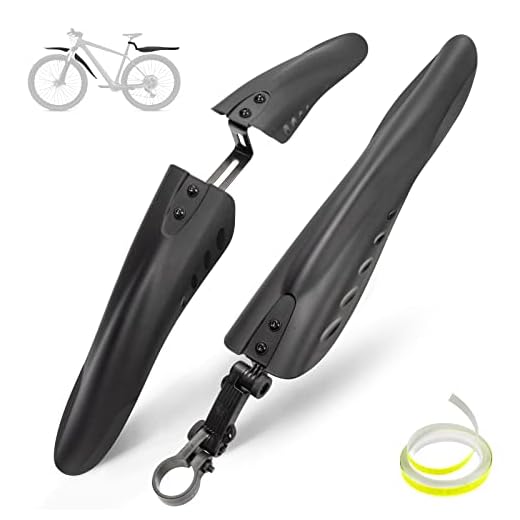
Install and Use Fenders, Mudguards, and Splash Protection
We’ve found that the right fenders turn a soaking commute into a tolerable one — especially when we’ve got kids, clean uniforms, or groceries on board. A good setup blocks the rooster-tail from the rear wheel and keeps hems and kid helmets noticeably drier.
Full‑coverage vs. clip‑on fenders
Full‑coverage (SKS Chromoplastic, Topeak Defender) gives the best protection, bolts to eyelets, and stays put on long rides. Clip‑on or seatpost-mounted guards (Planet Bike, Portland Design Works) are great for bikes without mounts and for quick removal, but they can flex on rough roads and give less coverage behind wide tires.
Mounting by frame type
- Frame with eyelets: use hardware-mounted full fenders for best stability.
- Step‑through or cargo e‑bikes: look for long rear stays or rack‑mounted fenders; sometimes a custom bracket is needed.
- Full‑suspension or odd geometry: choose flexible clip‑on guards and reinforce with zip ties or silicone straps.
Simple hacks and protecting passengers/cargo
- Attach a removable rear mudflap for extra spray reduction; rubber flaps are cheap and effective.
- Use fork protectors or small front fender extensions to keep feet and kid faces cleaner.
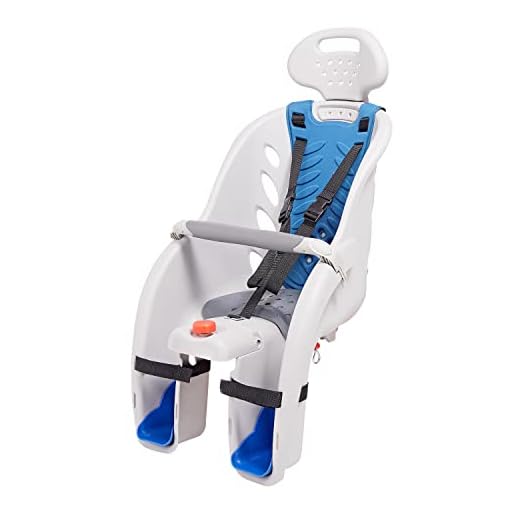
- Cover child seats and trailers with vendor rain covers (Thule Yepp cover, Burley accessory) and choose waterproof panniers (Ortlieb) or add a rain cape to the rack.
Next, we’ll tackle how we dress and layer so everyone stays warm and dry during the ride.
Dress Smart: Layering, Waterproof Gear, and Quick Changes
We keep our rain commutes comfortable by thinking in layers, speed, and kid-friendly simplicity. Small prep makes a wet ride feel routine instead of stressful.
Choose breathable, weatherproof shells
We pick waterproof-but-breathable fabrics (Gore‑Tex, eVent, or lighter options like Marmot PreCip or Patagonia Torrentshell) so we don’t steam up on short climbs. A helmet‑compatible hood or high collar, taped seams, and pit zips matter more than brand names for daily family use. Add a lightweight hi‑vis rain shell (Showers Pass or Proviz) over dark clothing for instant visibility.
Feet first: overshoes and quick covers
Packable overshoes keep feet dry without bulky boots. Look for slip-on silicone or neoprene covers that stow small and fit over sneakers for school runs.

Quick‑change systems for kids
We use a base layer + waterproof shell combo for children — think zip‑front shells, elastic cuffs, and suspendable rain pants. Pre-stage one complete outfit per child in a labeled drybag in the pannier so swapouts take 60 seconds. Elastic booties and oversized velcro mitts speed dressing.
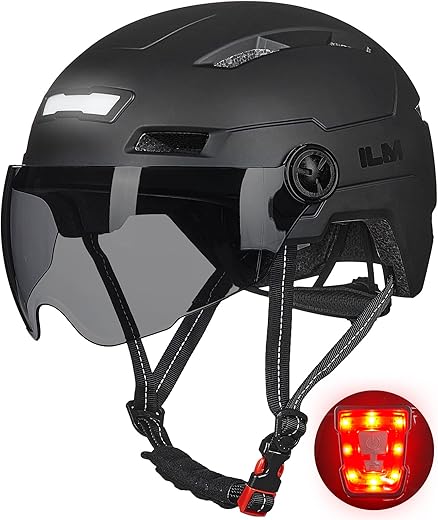
Helmet covers, comfort, and safety
Use fitted rain helmet covers that don’t block peripheral vision or secure straps. Pick breathable covers with reflective panels and avoid tight seals that trap heat. For toddlers, a brimmed hat under the helmet keeps spray off faces without compromising fit.
These small choices save minutes and tantrums while keeping everyone noticeably drier and safer on wet commutes.
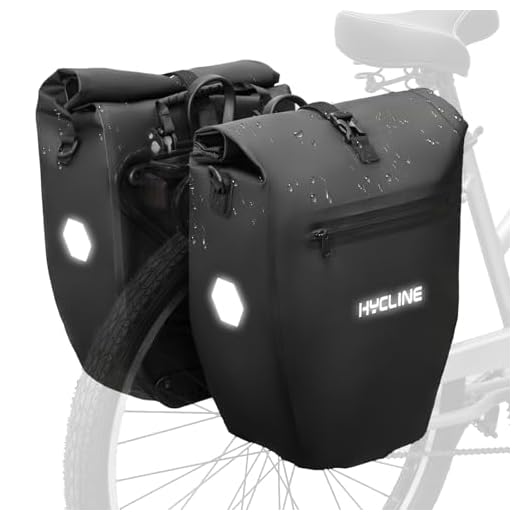
Pack Smart: Panniers, Waterproof Bags, and What to Bring
Choose waterproof carriers we trust
We favor true waterproof panniers or roll‑top dry bags — Ortlieb, Thule Shield, or lightweight Sea to Summit dry sacks — so wet roads don’t mean wet homework. For everyday family hauling, a roomy, durable pannier beats a backpack: easier access, less sweaty kids, and better balance.
Organize school items and snacks
We use small plastic bins or labeled zip cases inside panniers for lunchboxes, permission slips, and library books. One morning our youngest dropped a yogurt; the bin kept her folder pristine and saved a meltdown. For snacks, zip-top containers or bento boxes clipped into panniers stop crumbs and spills.
Pack a compact “rain kit”
Always keep a ready kit in one pannier:
- microfibre towel, a lightweight change of clothes, and a spare pair of socks
- several heavy-duty zip bags for wet items
- a compact poncho or kids’ emergency shell
Balance, secure, and protect devices
Distribute weight evenly left/right and low on the rack for stable handling. Use padded sleeves or small waterproof phone cases for devices and a clip pouch for quick-access items like keys or wipes.
Rain-ready emergency essentials
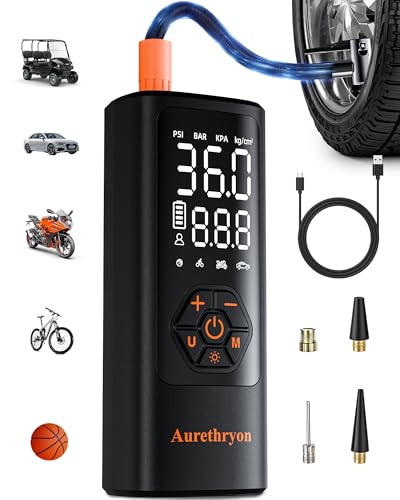
Stash a mini-pump, tire plugs, a multitool, a compact phone power pack, and a few spare cash or transit cards — we’ve learned that a small kit keeps a rainy commute moving without drama.
Be Seen: Lights, Reflective Gear, and Signaling in Low Visibility
Light strategy: front, flood, and rear
In gloomy commutes we prioritize a bright front light with a flood option for close-in visibility and a stronger spot for seeing further down wet roads. Good examples: NiteRider Lumina or Bontrager Ion series for strong beam options. Pair that with a flashing rear like the Bontrager Flare R or Lezyne Strip Drive so drivers can spot us from behind earlier.
This is our essential lighting kit:
- bright handlebar light with flood/spot modes
- a helmet light mounted higher for driver eye level
- a flashing rear light on the seatpost and a secondary rear on packs or kids’ seats
- a small USB power bank or spare AA battery pack for backups

Mounting, backups, and placement
Mount lights at different heights — handlebar for road illumination, helmet for drivers’ sightlines — and angle them slightly down to reduce glare on wet pavement. Keep a charged power bank in our pannier and rotate batteries after long rainy weeks.
Wearable visibility for adults and kids
High‑visibility rain ponchos, reflective ankle straps, and helmet decals do more than look nice — ankles move as we pedal, drawing attention at vehicle headlight height. We like lightweight reflective ankle bands for kids and adults alike.
Signaling and eye contact
In the rain drivers’ stopping distances and reaction times increase, so we slow down, make eye contact at intersections when possible, and use big, clear hand signals early. These simple habits keep our family visible and predictable until we get to the next safety topic.
Ride Like a Parent: Weather-Aware Riding Techniques
We slow down our thinking as much as our speed when the pavement is slick. Small habit changes keep everyone safe and make rainy commutes predictable.
Braking and throttle control
- Brake earlier and more gently — give at least twice the usual stopping distance.
- Feather both brakes; avoid grabbing the front suddenly. Wet rims and tires take longer to bite.
- Use smooth, steady throttle on an e‑bike to prevent rear wheel slip; practice gentle starts in a quiet parking lot.
- Avoid sudden turns or hard cornering; take wider, slower lines.
- Steer clear of painted lines, metal grates, and wet leaves — they get slippery.
- Scout puddles from the edge first. A deep puddle can hide potholes or debris; when in doubt, walk the bike or detour.
Lane position and interaction with traffic
- Ride where drivers can see us: a clear, assertive lane position a little left of curb keeps us out of the gutter and away from car spray.
- Make eye contact at intersections and use big, early signals so drivers can predict our moves.
Riding with kids or passengers
- Accelerate and brake more gently with a child seat or trailer (Burley trailers and Thule/Yepp seats handle well but still add momentum).
- Anticipate school drop‑offs and stop points—give extra time and practice rainy routes during quiet hours to build confidence.
Next, we’ll turn our soggy bikes into ready-to-ride machines with quick post-ride care and maintenance.
After the Ride: Quick Drying, Cleaning, and Maintenance Routines
We finish the commute with a few calm, reliable habits that stop corrosion and save time later. These five-minute rituals keep our e-bikes ready for the next school run.
Quick wipe and dry
- Use a microfiber cloth (or Park Tool shop towel) to wipe the frame, fork, and exposed bolts.
- Give the chain a fast wipe with a rag to remove grit; avoid spraying degreaser unless you’ll re-lube afterwards.
Drivetrain and lubrication
- Once the chain is dry, apply a wet-weather chain lube (Muc-Off Wet Lube or Finish Line Wet) sparingly and wipe off excess.
- Check for sand or grit near brake pads and rims/discs; gently brush grit away with an old toothbrush.
Battery and electronics
- Pat battery, charger, and connectors dry with a soft cloth; open seals only if the manual says so.
- If connectors look pitted or dirty, clean gently and add a tiny dab of dielectric/silicone grease to prevent future corrosion.
- If you smell burning or see corrosion on terminals, stop and get professional help.
Simple arrival checklist
- Remove wet clothing and hang helmets to dry.
- Open panniers and air out or hang liners to prevent mildew.
- Do a quick brake and light test before your next ride.
When to call a pro
- Water in lights, persistent electrical faults, strange motor noises, or soaked hub motors need shop diagnostics.
A few minutes of post-ride care keeps our e-bikes dependable and gets us back to family life faster.
Rain-Ready Routines Keep Our Family Moving
With a little prep and a few steady habits, rainy e-bike commutes become manageable and even enjoyable for our family. Small investments in waterproof gear, fenders, reliable lights, and basic maintenance save time, stress, and soggy clothes.
Let’s try one tip at a time, learn what works for our routines, and celebrate the wins — dry kids, happier mornings, and safer rides. Share what helps you so we can keep moving, come rain or shine.